Navigating the Schedule Page
One of the most powerful components is the Schedule page where you'll have access to three core types of content -- informational, geographic, and time-oriented. This article will introduce you to some of the key terminology and functionality of the Schedule page and its screen "real estate".
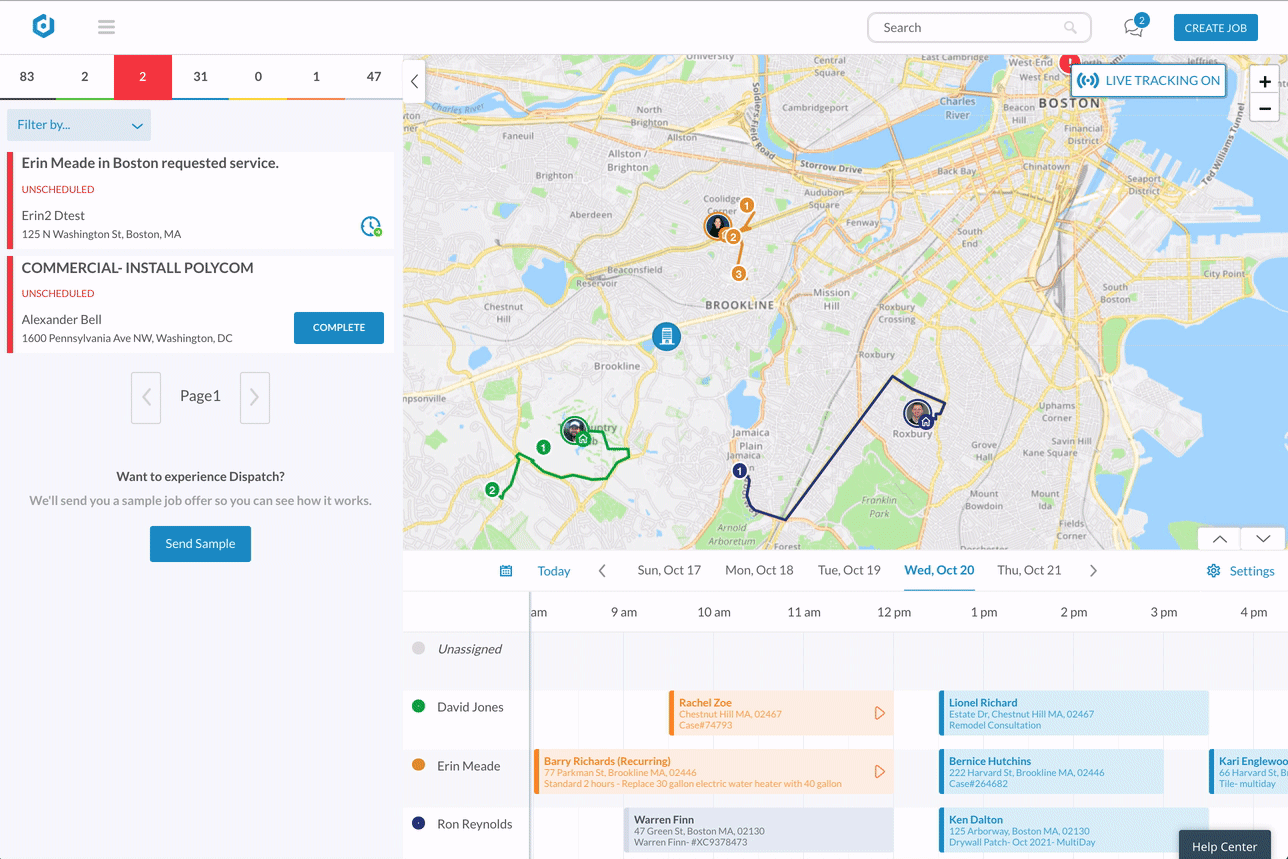
The Schedule page is divided into three "panels" that are discussed in more detail in the rest of this article: the Jobs, Map and Calendar.
Article Sections
Jobs panel
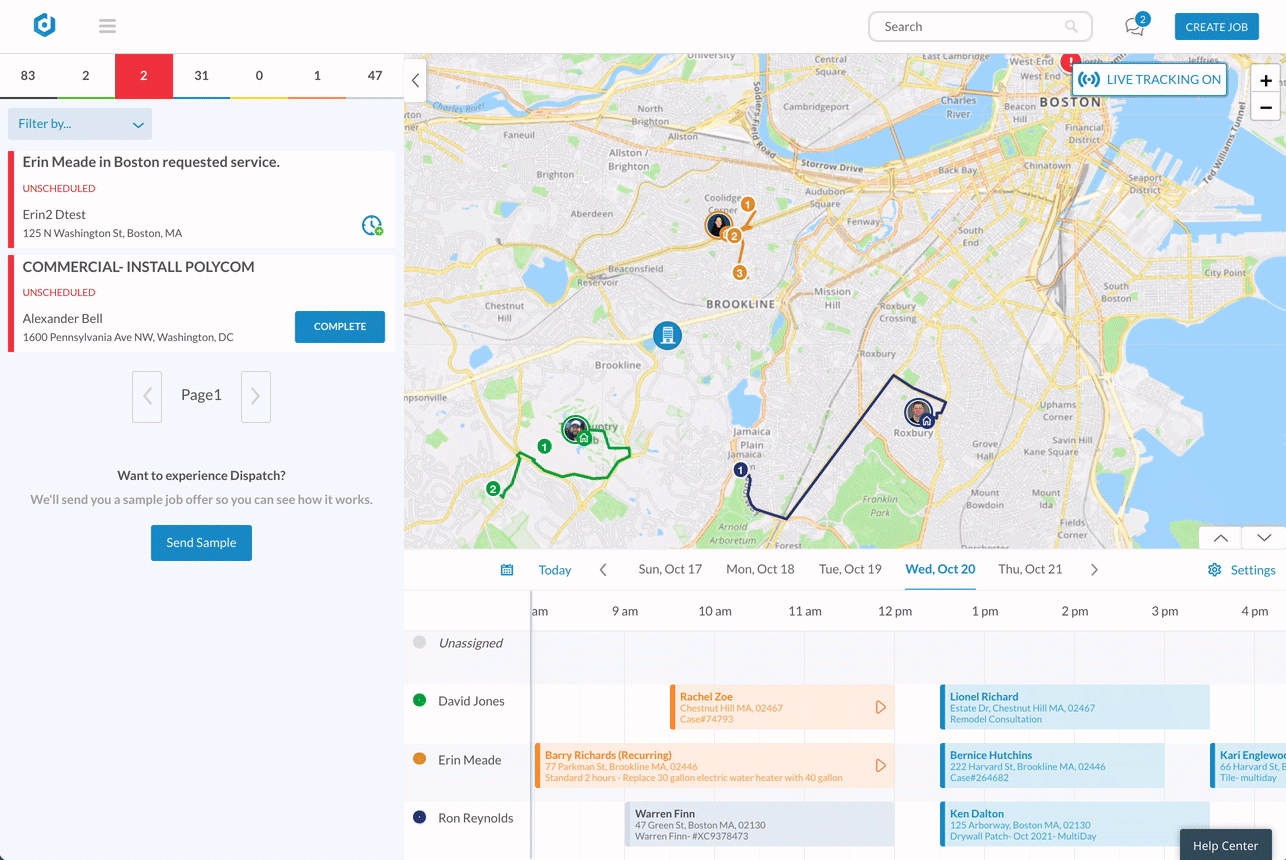
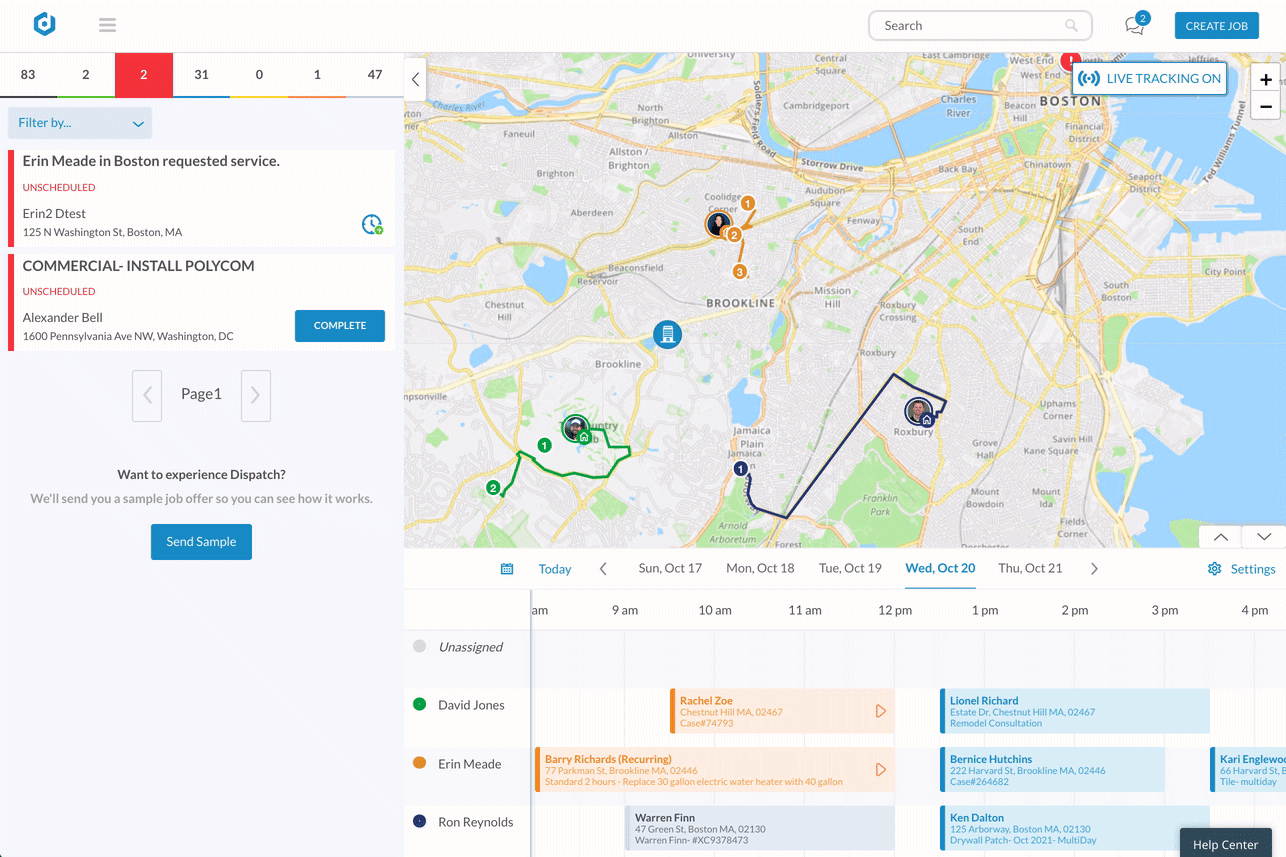
The Jobs panel is where the information about all of your jobs and each individual job lives. By default, you will see a list of jobs that appears in the order they were created from newest (top) to oldest (bottom). This view is intended to give you critical information first, allowing you to open an individual job to view all relevant content.
In the list view, we show you:
- Job Title & Source
- Next Appointment
- Customer Name
- Job Address
- Job Labels
- Job Status

Filtering
Further filtering of the job list is possible through the available options at the top. These include job statuses, groups ( learn more) and miscellaneous options under the 'Filter by' toggle.
The filter options include:
- Job Labels
- Technicians (assigned to appointments attached to the jobs)
- 3rd Party Sources (jobs automatically created through an Enterprise partner)
- Service Types
- Groups
- Job Statuses

Details
Opening a Job will give you all related information without leaving the Schedule page. Within this view will be shown the following in no particular order:
- Job Status & Options
- Job Title & Description
- Job Location/Address
- Customer Information
- Name
- Phone
- Contacts (additional contacts if applicable)
- Appointments
- Job Labels
- Notes, Photos, PDFs
- Estimates & Invoices
- Job Forms
With details shown you'll be able to scroll further down the page to access information below the visible part of the screen.

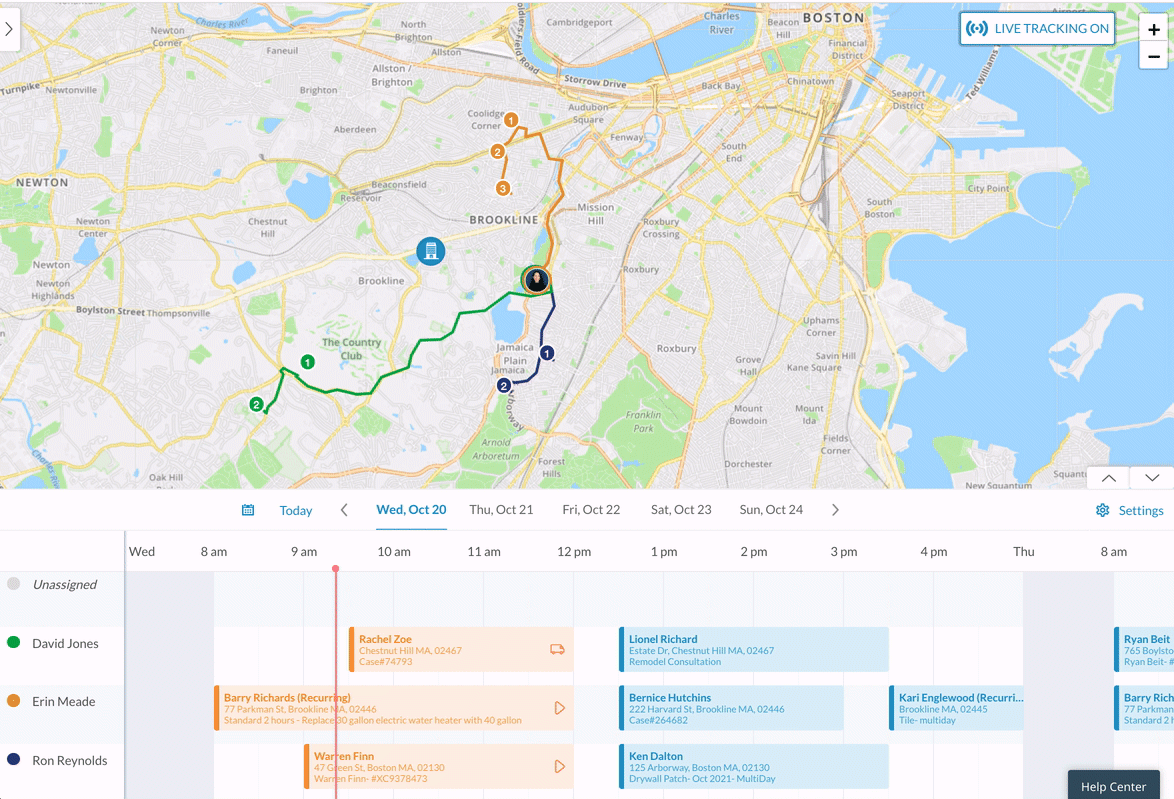
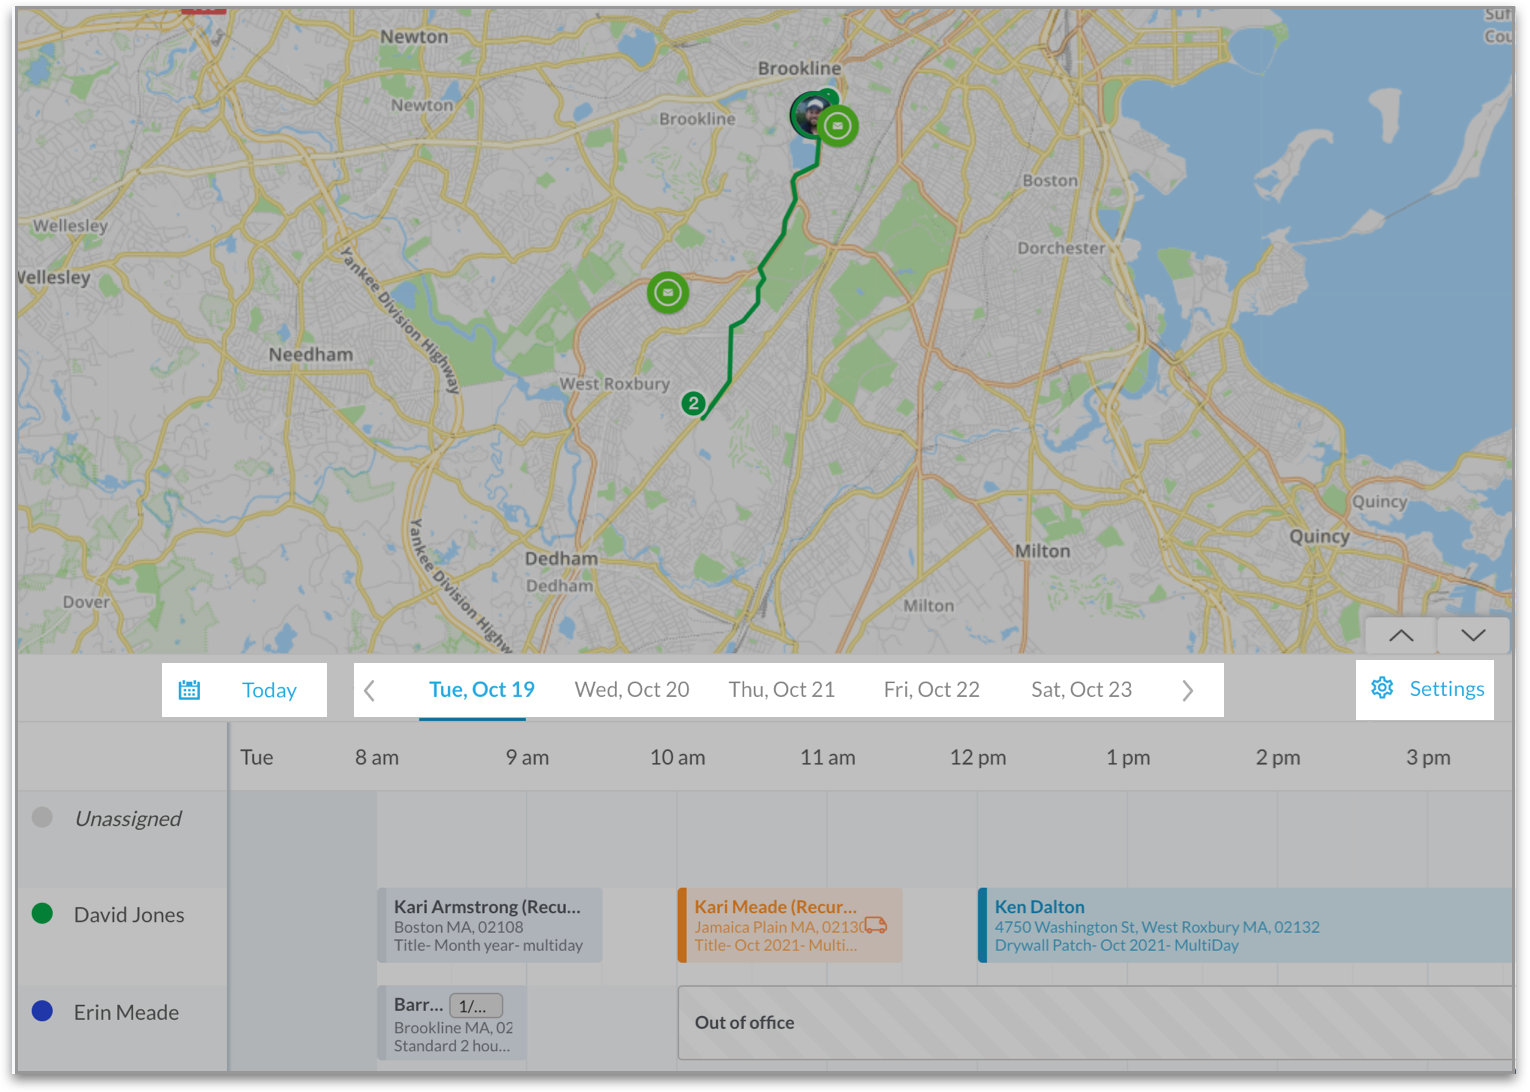
Map panel
Knowing where appointments are located, last locations of your staff and future job locations offers an insightful view across your company. The map is designed to give you near real-time visibility to the health of daily progress and upcoming work.
On the map will be displayed a set of functions that help you work through scenarios such as scheduling last-minute appointments with staff who may be available nearby. What can you expect to view?
- Topographic Visual Representation & Points of Interest
- Zoom (In, Out)
- Resize, Minimize, Maximize options
- Live Tracking (toggle)
- Job Location Pins
- Suggested Routes
- Staff Locations

Map Functions
When you'd like to maximize views in to the map, there are several options at your disposal.
1. Zoom
Get closer detail or an overall picture by using the Plus & Minus buttons.

2. Live Tracking
Toggle whether or not you wish for your team to automatically update on your screen as their locations change. In order for Live Tracking to work properly, your field staff must have location tracking permissions enabled for the Manager/Field mobile apps.

3. Team Member Location
At any time you'll have visibility to the last known location update of a team member. Their individual location will be presented on the map with an additional detail stating the last time a location update was captured.

4. Trip Route
Recommended travel routes will be displayed between the assigned team member and job location, presented based on traffic conditions and travel distance, giving the best available route.

Notes on what you will notice on the Map in Schedule View
- Your technician's assigned appointments will be numbered in order by the appointment Start Time on a given day.
- Any Scheduled but Unassigned appointment will appear on the map with a red exclamation mark symbol. Similar to how they appear in our Dispatch Manager app.
- If you have a Home Address listed for a Technician in their user settings, their Home Address will appear as the starting point for their route on future days.
Calendar panel
The Calendar panel is where you will find your appointments organized by date/time and by the Technician assigned. At the top of the Calendar panel is the navigation bar, which controls what is shown below on the Calendar.
The rest of the Calendar is broken into rows, including an Unassigned row at the top, where you will find Appointments that have been scheduled but not yet assigned to a Technician. Below that, you will see a Technician row for every user with a role of Technician or Both in the system. Any appointments will appear as cards at the appropriate time for a particular Technician. Clicking the job's location dot will also open its full Job Details in the Jobs Panel.
The calendar displays several key details allowing for view in to the daily and weekly schedule. Several functional details are included at a glance, with some allowing for more granular visibility:
- Day & Week, Working Hours, Current Day
- Appointment Date & Time
- Job Title & Address
- Customer Name
- Appointment Status
- Technician schedule
- Technician profile
Key Functions
1. Day & Week Views
By default, the schedule view shows the current day. In the center of the schedule view are the next five days of the week. This is convenient for swiftly viewing an upcoming day’s appointment schedule. Use the arrows at each end of the week to view prior and upcoming weeks.
To find or view a day further out in time, click on the calendar icon located on the top left of the schedule gantt, just below the map view. Select a day on the schedule to view that day’s appointments on your screen.
To quickly return to the present day, click the ‘Today’ button, located to the right of the ‘calendar icon,’ to view today’s schedule.
2. Month View
A recent update to the Dispatch Calendar is the addition of the Month View format. The Month View will allow you to view Appointments and Technicians assignments from a holistic and long-term format.
3. Appointment Cards
Visually at a glance we display Customer Name, Job Address and Job Title.
Opening any appointment on the calendar with a simple click will load the related job details in the left panel. There you'll be able to navigate to view relevant information such as full customer details, other appointments on the job, notes, and more. The color of the appointment represents the current status: scheduled, en-route, started, complete or canceled.

4. Technician Profile View
Get quick insight into individual Technicians from the calendar by clicking on their name. This will show their registered profile photo, contact information, set working hours, and even allow for printing their schedule.
If you need to modify their settings, visit the team page to make any change you wish.

Schedule View and Settings
The Schedule page has a variety of options and views that can be adjusted by Dispatchers to provide a customized view.
Schedule Settings: Resizing Views
You have the option of resizing your schedule page to your preferred view. Click the Up/Down arrows on the bottom-right of the map to increase or decrease the size of your map or schedule.
Clicking on the up arrow displays a larger view of your technician's schedules.
Clicking the down arrow increases your map view, beneficial for seeing technician routes.
Use the arrow located in the top left corner of the map view to hide the jobs panel.
Schedule Settings: Save Preferred View
On the Schedule page, Dispatchers can customize and save their preferred view type. This allows Dispatchers to set their preference to Day View, Week View, Day View (Thin), or Week View (Thin).
To save your preferred schedule view:
- Go to the schedule page
- Click on the gear icon to open the schedule settings menu
- Select your preferred view from the drop down menu
Click Save!

Selecting the Day View or Day View (Thin) options will only allow a Dispatcher to scroll between the hours in a particular day, and will show smaller appointment blocks if the “Thin” option is chosen.
Selecting the Week View or Week View (Thin) will allow a Dispatcher to scroll left or right to move between different days in the week without needing to change days using the Date Selector. The Week View (Thin) will show smaller appointment blocks via the schedule.
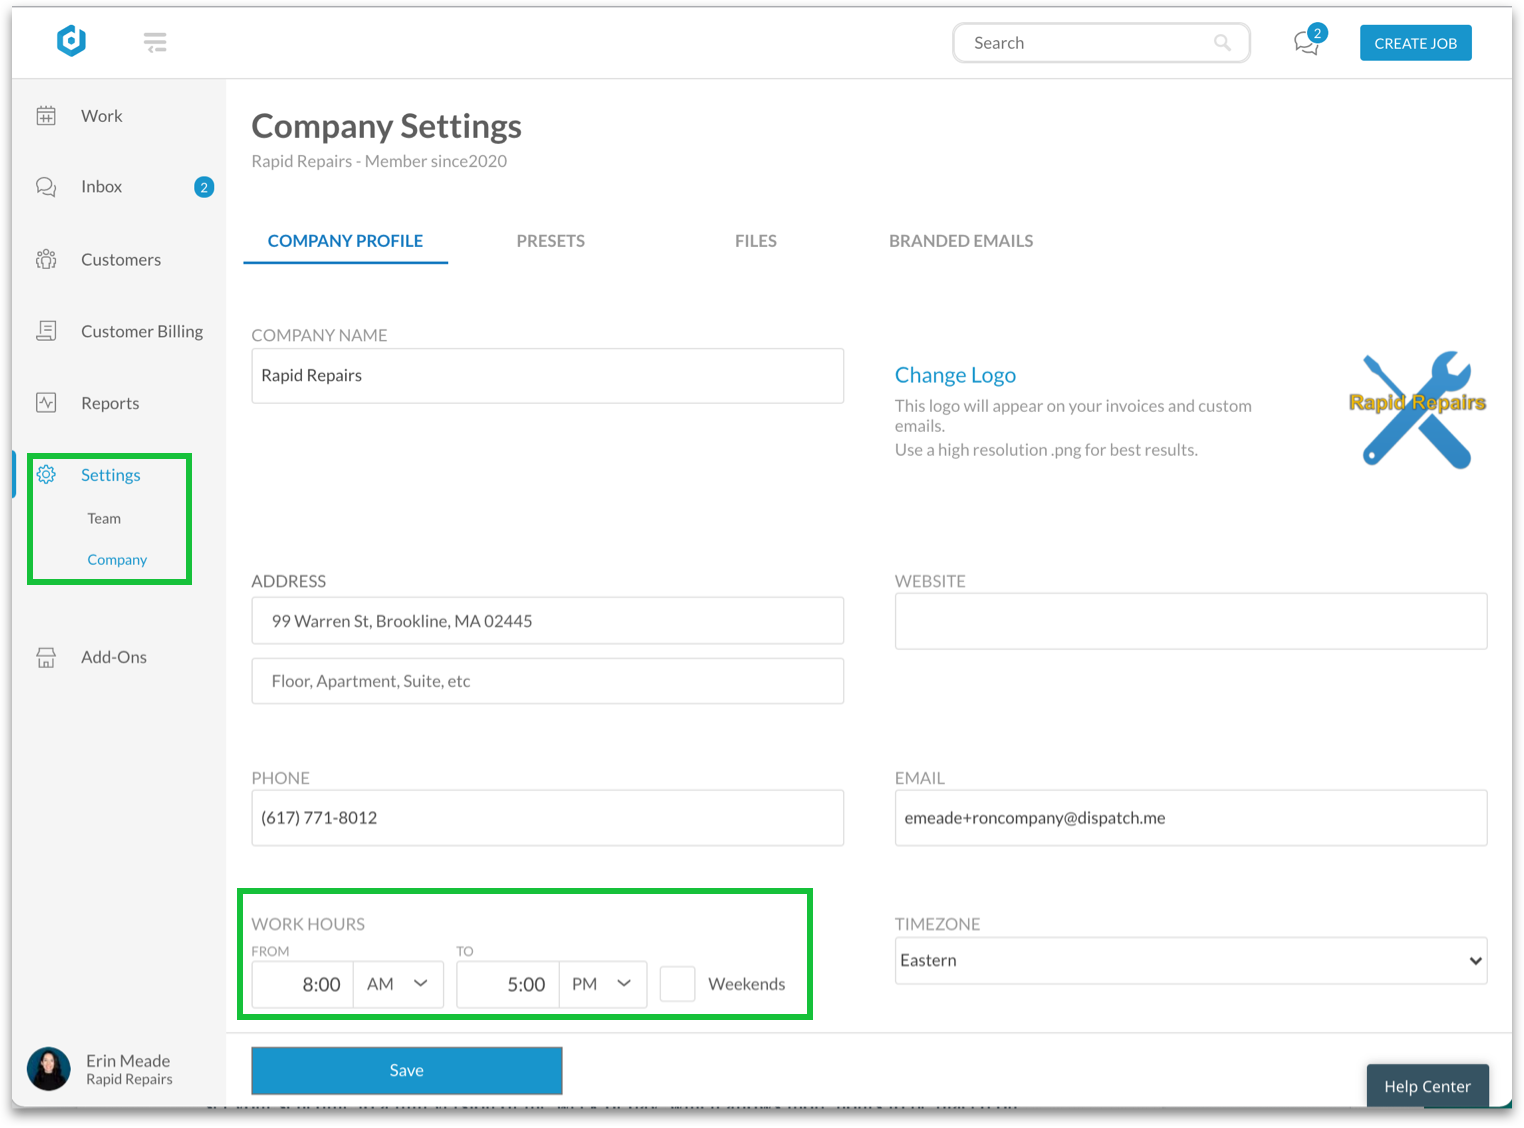
Schedule Settings: Work Hours Only
Dispatchers also have the option to only display their company Work Hours from the schedule view. Work Hours can be updated on the Company Settings page.
When this setting is toggled on, the timeline view will then be restricted to your company's working hours by default.

Work Hours can be updated on the Company Settings page.
Schedule Settings: Hide Completed Appointments
Dispatchers using the Work platform have the option to hide completed appointments from the schedule view.
Dispatchers can hide completed appointments by accessing the Settings button via Schedule tab in Work.

When this setting is toggled on, all completed appointments will automatically disappear from the schedule. Completed appointments will still be accessible via other areas within the Work platform. Toggling this feature back off will return completed jobs to the schedule view.
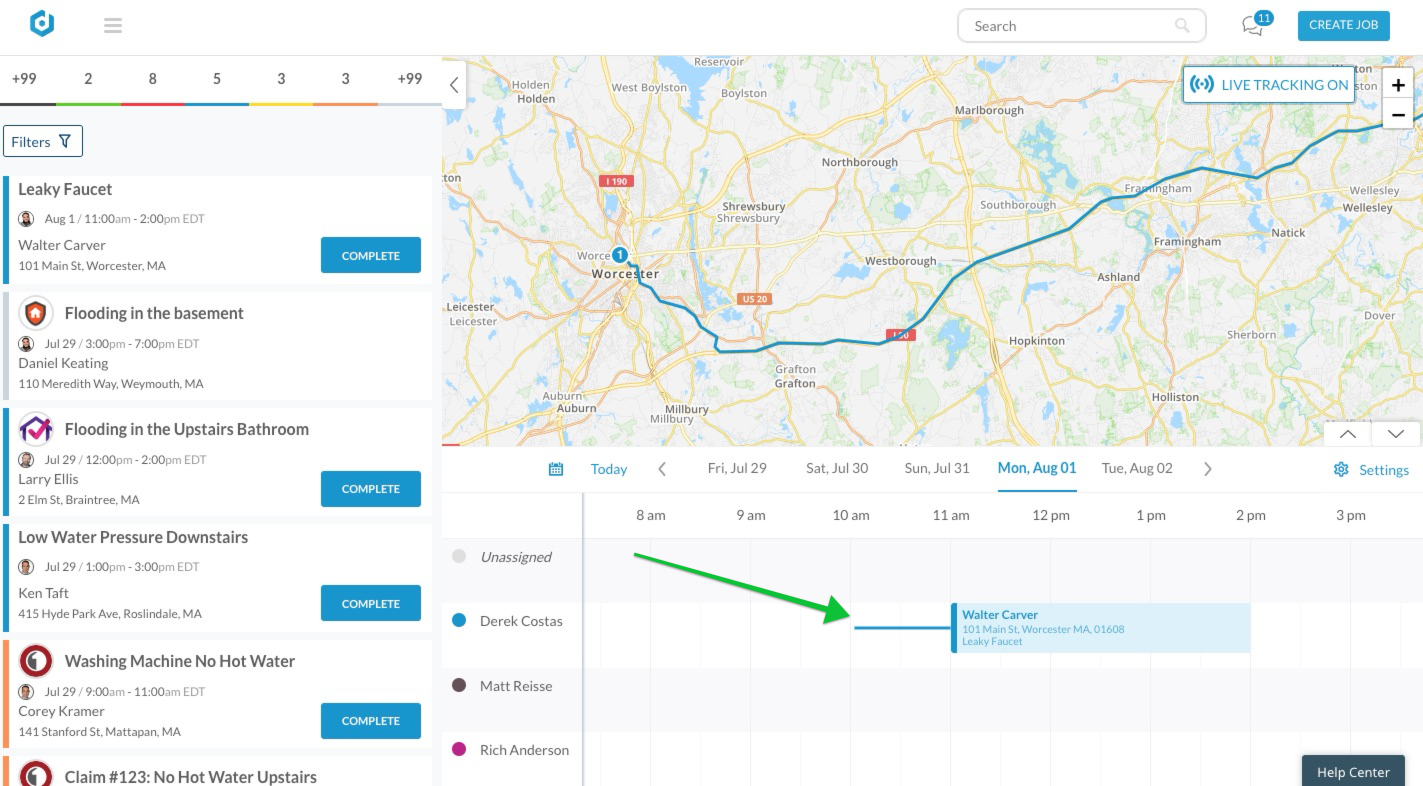
Schedule Settings: Estimated Travel Time
Estimated Travel Times allow Dispatchers to view the estimated time a technician will need to travel to arrive at their next scheduled appointment.
Dispatchers can enable the option to display Estimated Travel Times by accessing the Settings button via Schedule tab in Work.

When this feature is enabled, the schedule page will show travel time estimates extending between appointments in the form of a blue line. Dispatchers can hover their cursor over this blue line to see estimated travel time displayed in minutes.
Common Questions
We've provided answers to some popular concerns that you may find helpful.
1. The schedule page seems to run slow, what can I do?
At times your experience could operate slower than desired. This is typically a result of trying to load too much data at a time. Since we utilize your browser experience and attempt to store data locally in a temporary fashion, you may need to clear your local browser cache.
One standard situation is trying to view appointments across your entire company for a week at a time. Filtering down the data to viewing a single day at a time and even cutting down how many Technicians are shown on the calendar at a time can help.
2. My appointments are not showing, where did they go?
If you're curious about a specific appointment, contact our team to help investigate. We'll need to know which day you believe an appointment is missing and the full name of the customer. It's even helpful to know which Technician the appointment was supposed to be assigned.
3. Why aren't my Technician locations showing updated on the map?
There are several factors that come in to play with location tracking. It's important to ensure your Technicians are on the updated versions of the mobile app AND have enabled the mobile apps to access their location tracking services. Without access to the device's location services it's impossible to display the known location of the Technicians. When the "No Data Since:" text is displayed for a given Technician, it is due to no further location updates captured by our system since the timestamp mentioned.
Furthermore, location updates only occur after moving 100 Meters AND/OR when actively traveling. Driving on a highway, for instance, will update locations based on time (such as every few minutes) rather than distance as to not overload sending of data unnecessarily.