Custom Labels
Labels allow you to organize and easily sort through your work. Job and Customer labels allow you to improve your workflow and organization.
Article Sections
Creating Job and Customer Labels
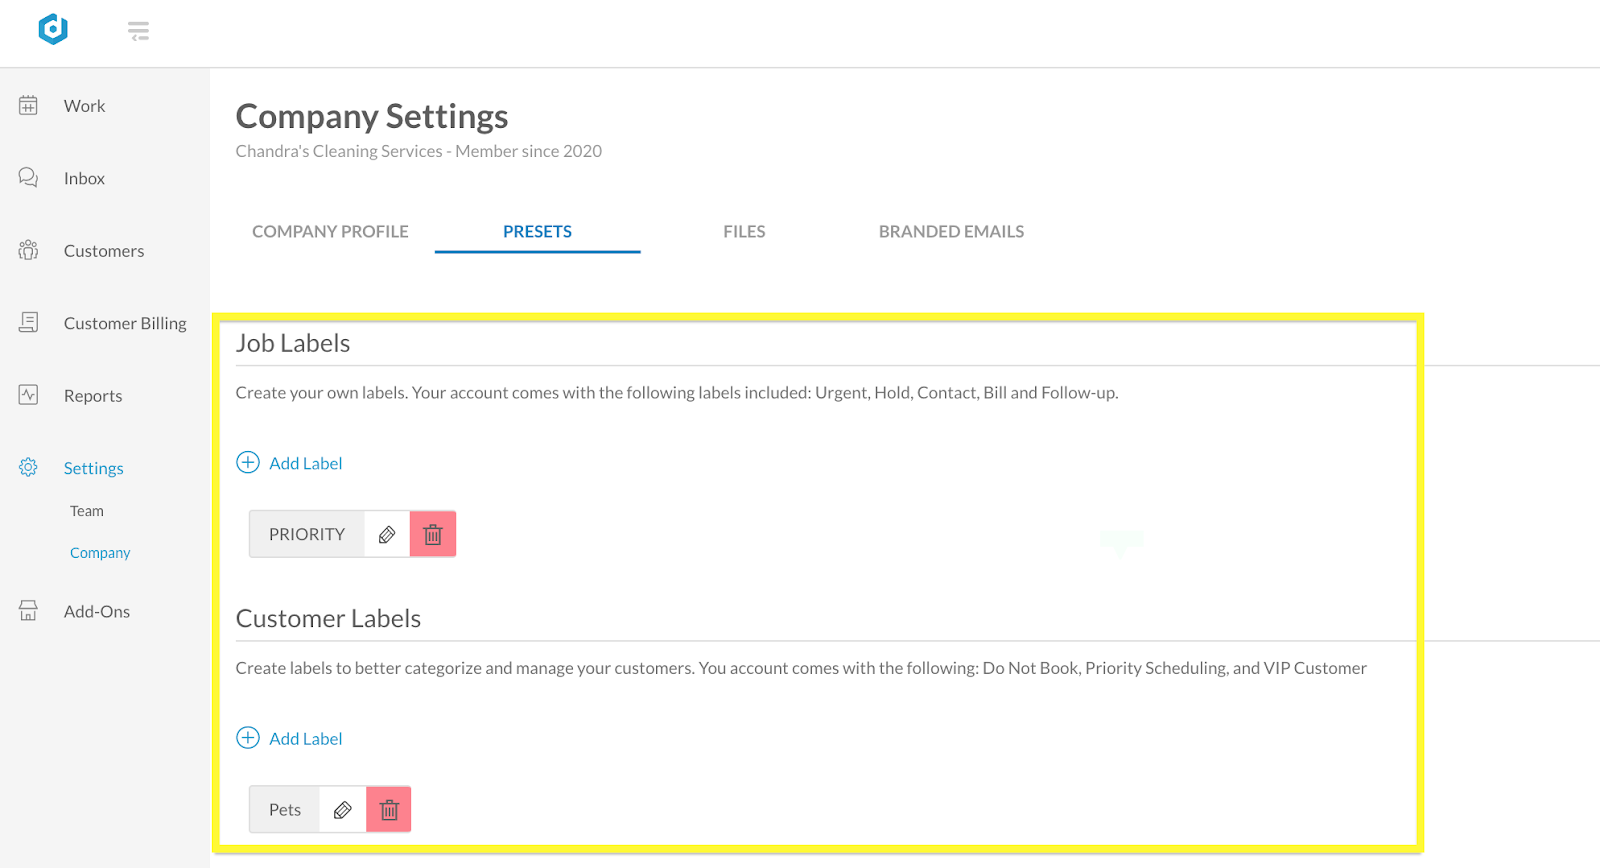
You can create your own labels in the Company Settings tab. From Company Settings, select Presets
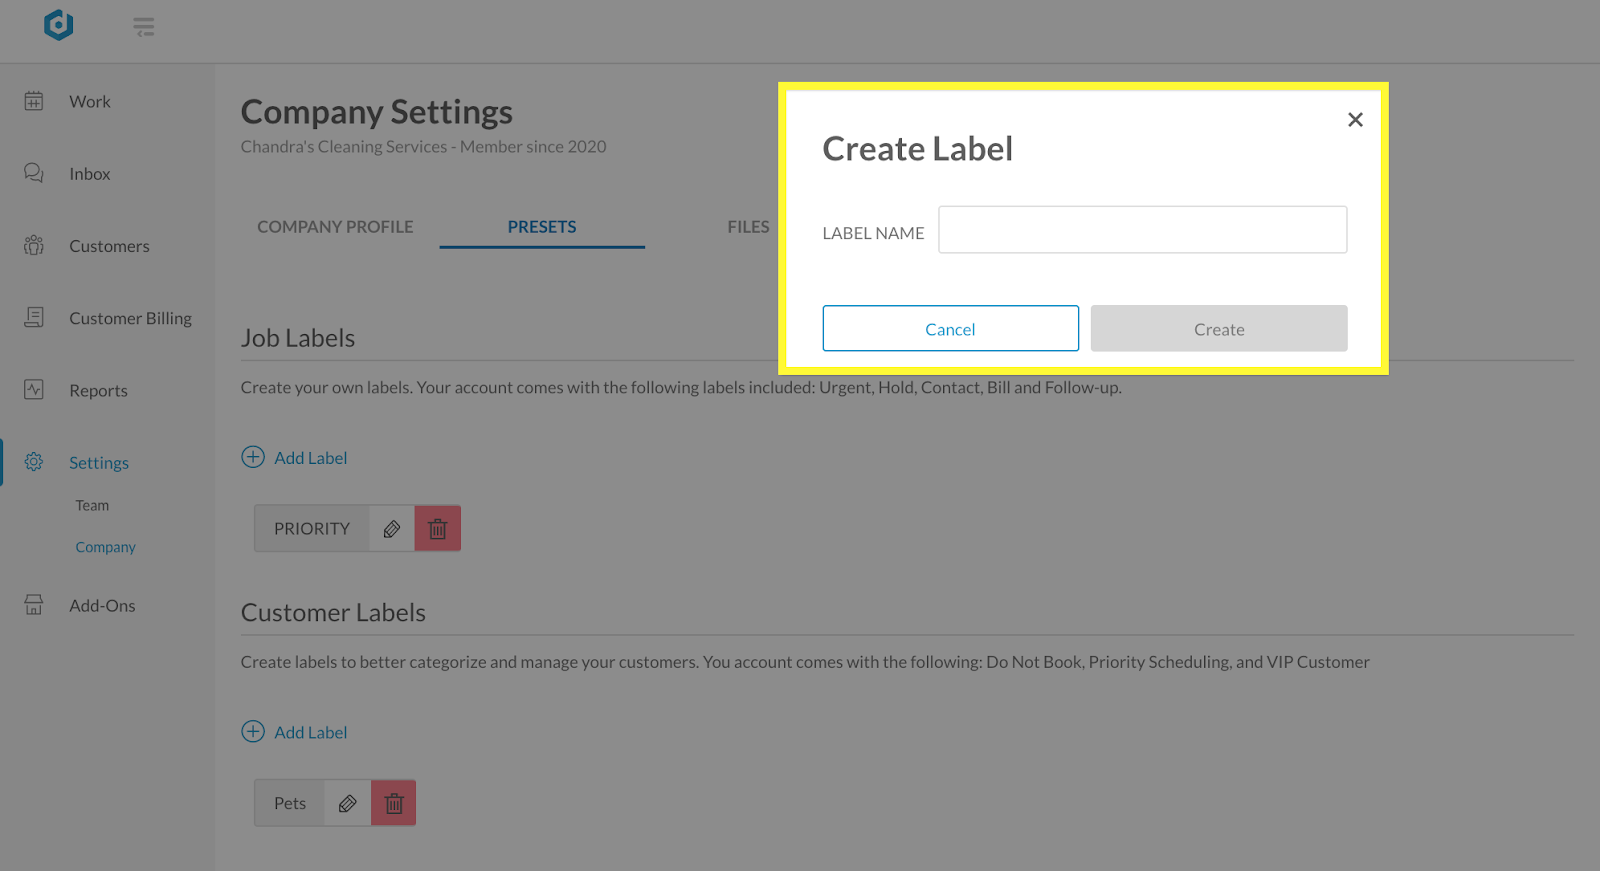
When adding a label select add label and a pop-up will appear. Add your new label in the pop-up and select create. This will add a new job or customer label to your list.
Adding Labels Jobs and Customers
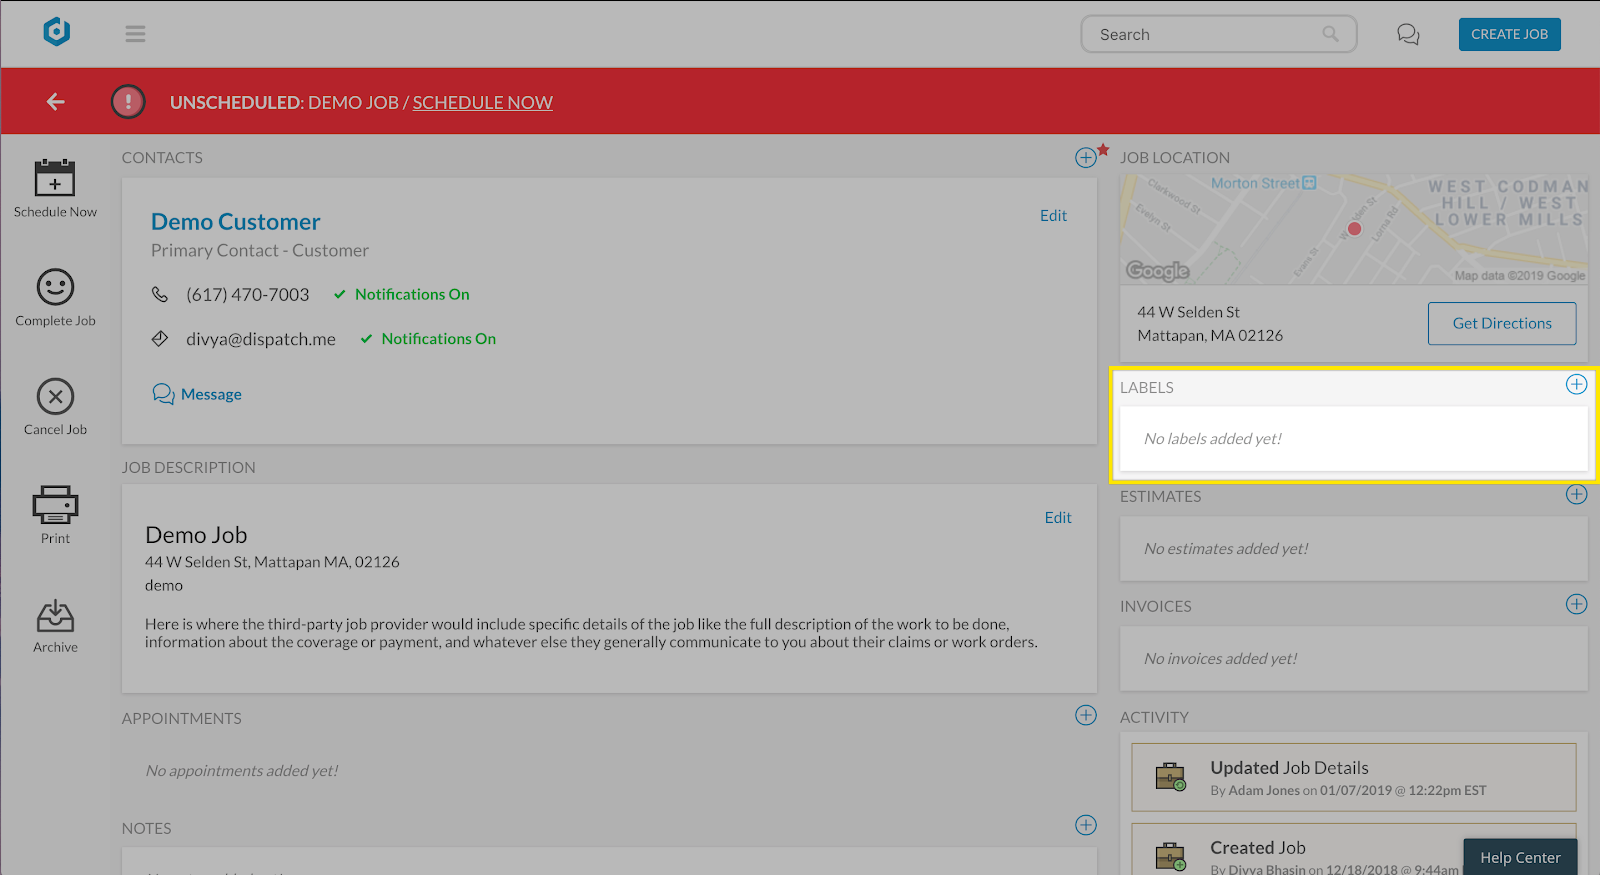
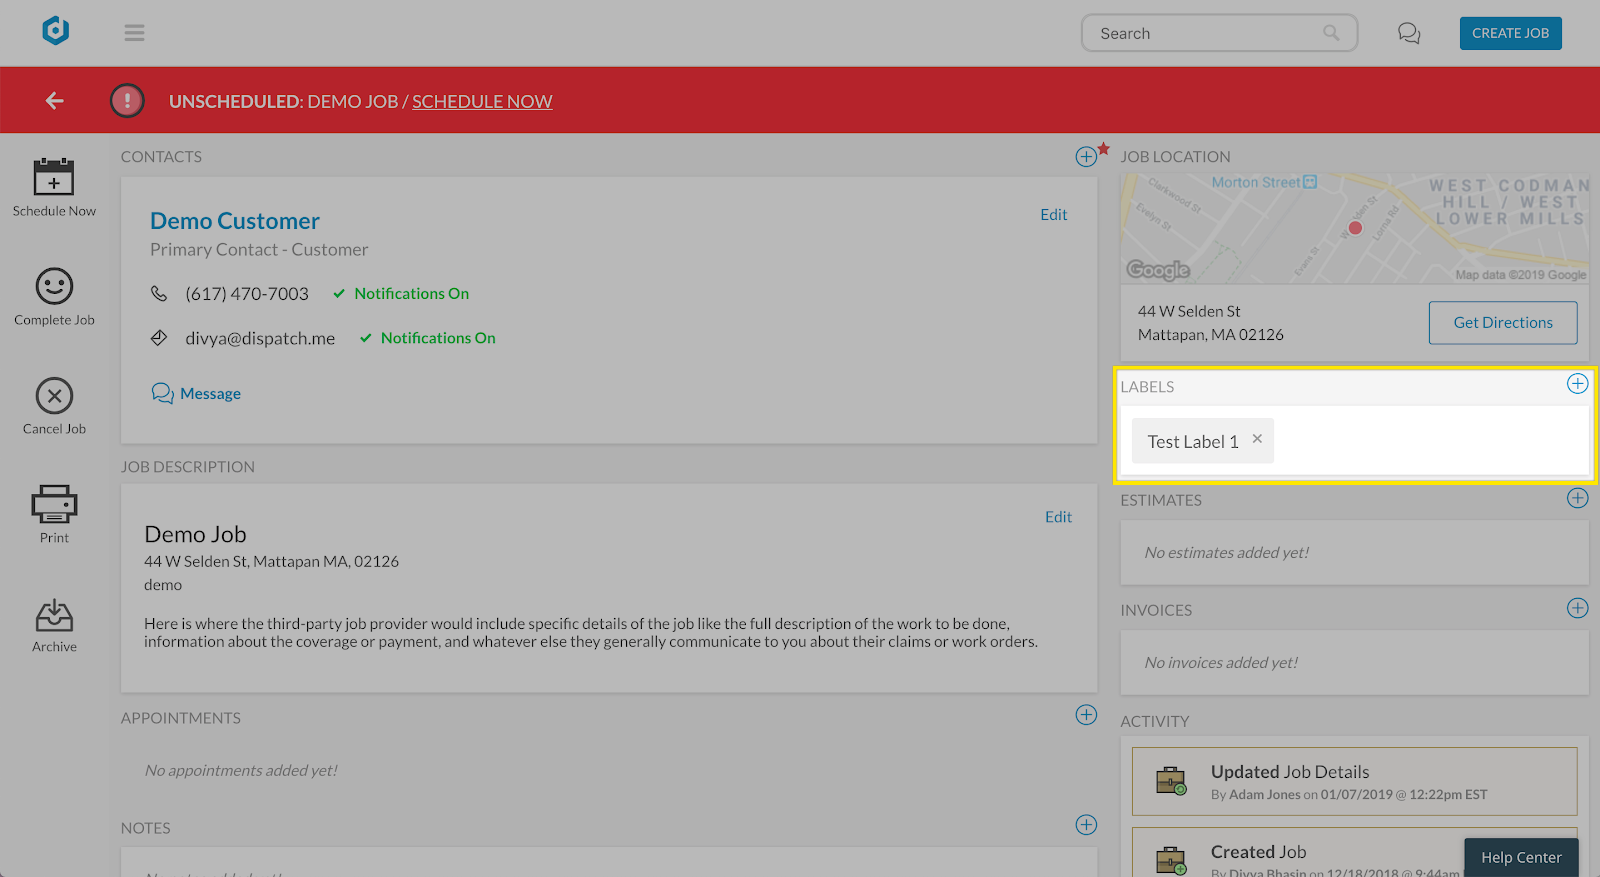
You can add a label to a job in job details from either the Schedule or Job page. You can see the labels section on the right side of the image below. Press the plus (+) button to add any label to a job.
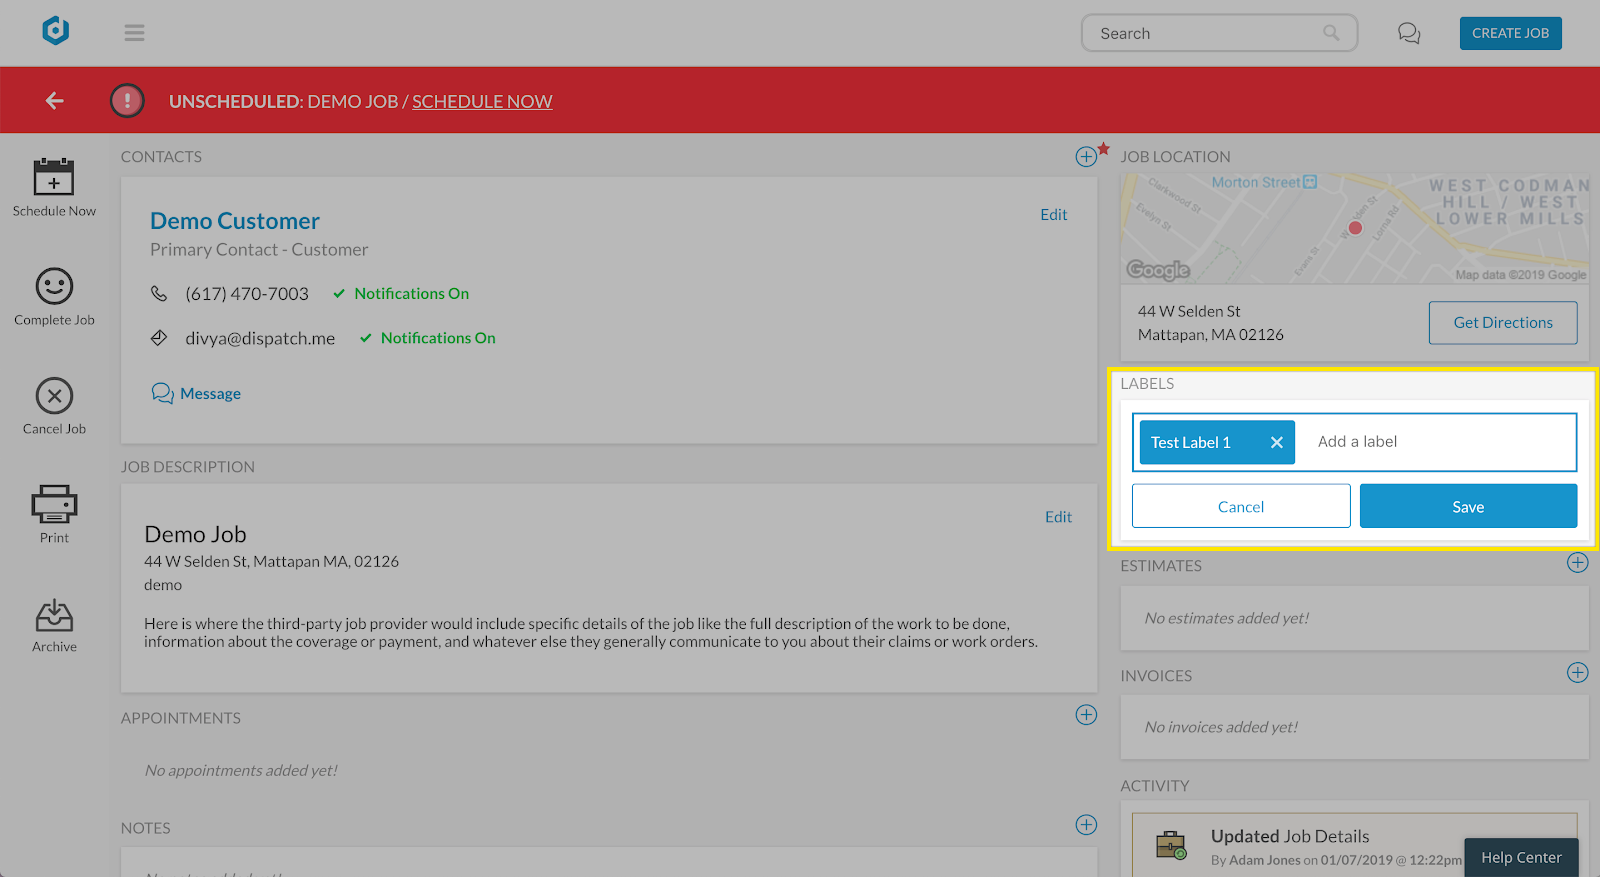
When adding a label you will search for your custom or standard label, then select the label you are looking for and then press save.
You can add a label to a customer directly from the customer information section.
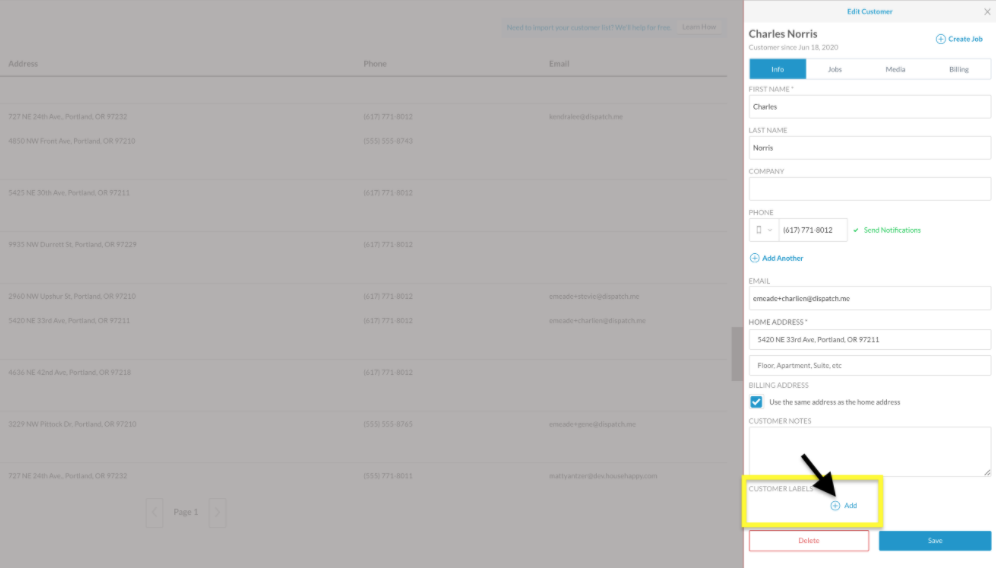
Click Add at the bottom of the customer panel.

Begin typing in the name of any of your preset customer labels and then click enter.
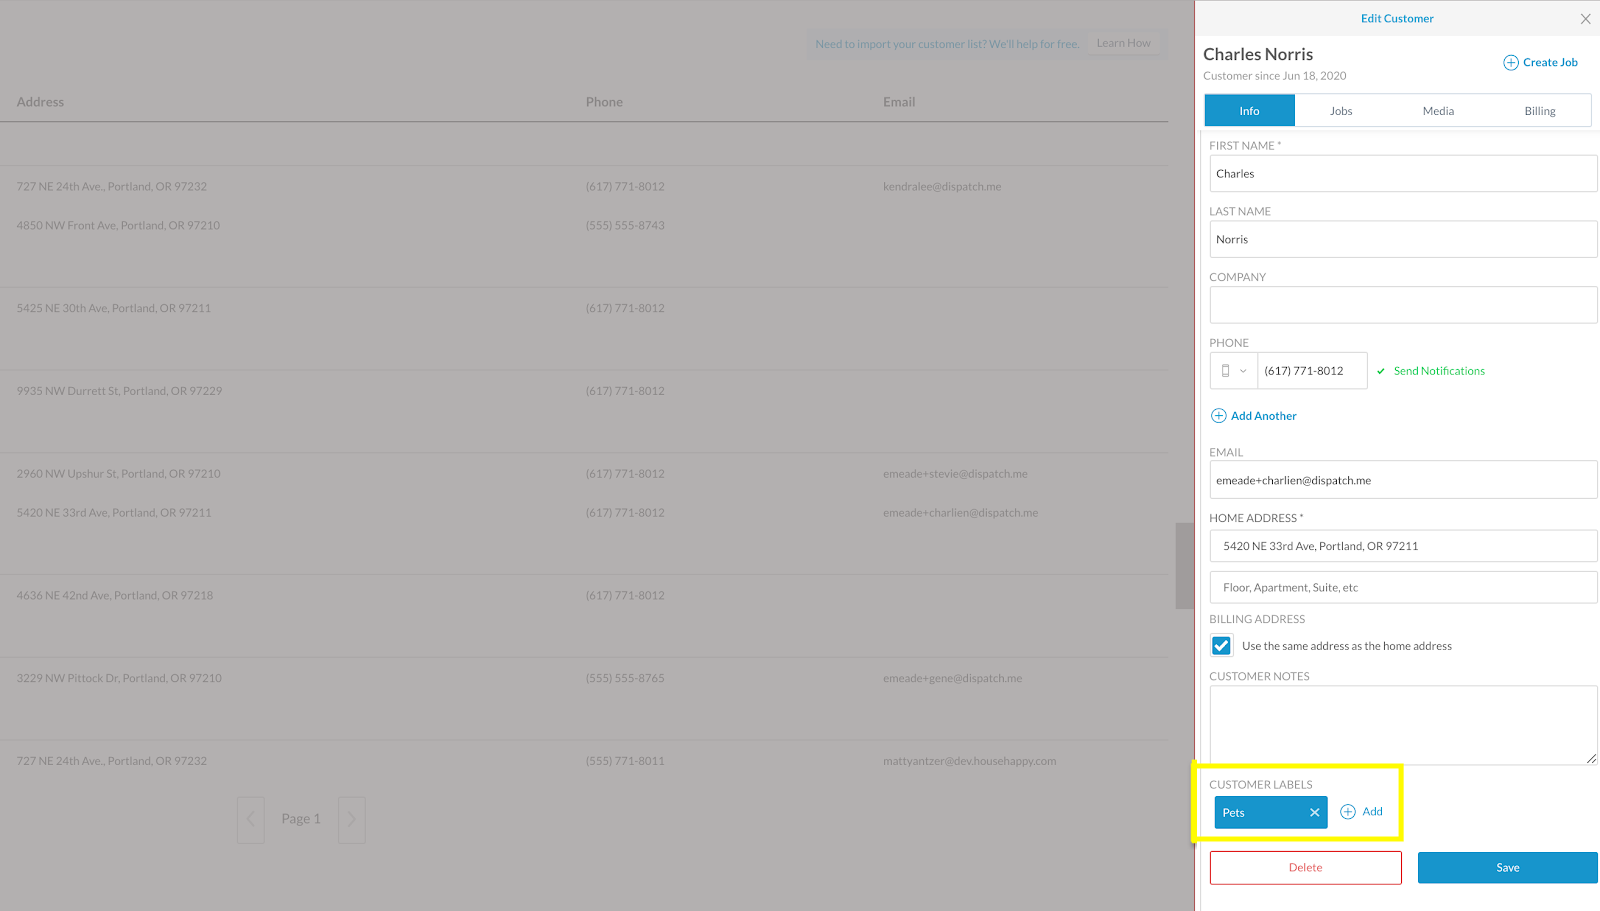
You will then see the customer label shown in a blue box.
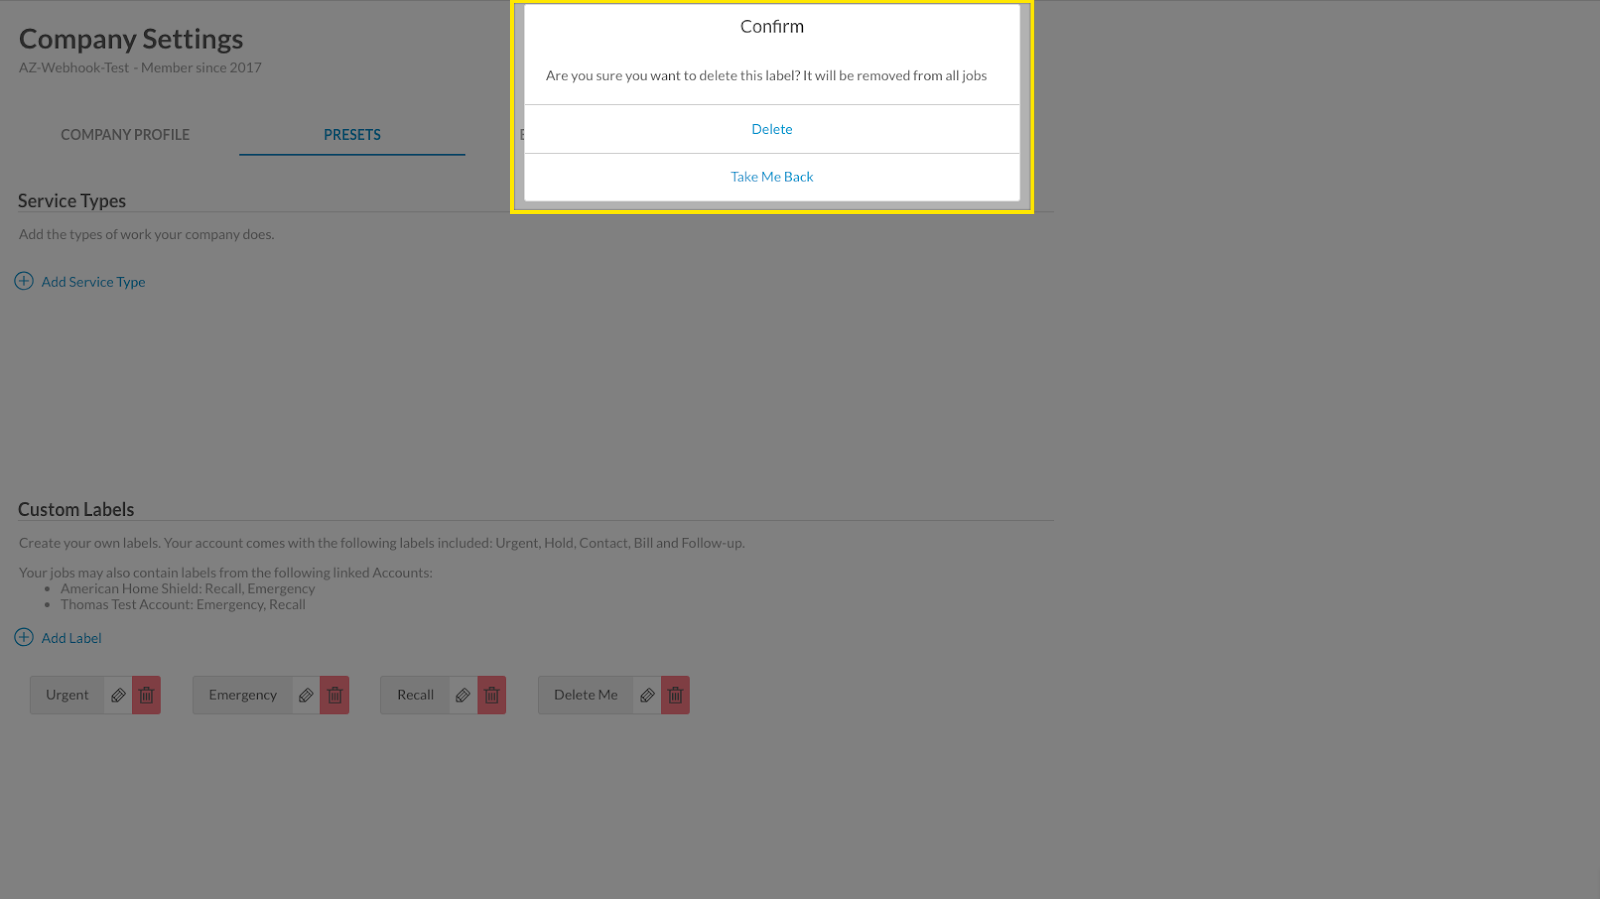
Deleting Labels
If you would like to delete a label completely you will need to navigate back to the Company Settings page. From there you will see all the labels you have created. Click the red trash can on the right side of a label to delete it. A pop-up will occur asking if you are sure about deleting the label. If you are just click delete.
Job and Customer labels are ideal for adding company specific categories to jobs and customers. These can help improve your company's workflow by making it easier to find what you need quickly. Labels offer a deeper level of customization to help meet your business needs.